Automating WhatsApp Messaging with Python: A Step-by-Step Guide
Written on
Chapter 1: Introduction to WhatsApp Automation
Automating tasks using Python is one of its most intriguing features. One of the most frequent activities we engage in daily is sending messages on WhatsApp. While it might seem as simple as picking up a phone, typing, and clicking "send," we often overlook sending messages on important occasions, such as birthdays and anniversaries.
Can we schedule WhatsApp messages using Python? Absolutely! By installing a library called pywhatkit, we can easily set up messages to be sent to our contacts or groups.
This guide outlines the three essential steps to send WhatsApp messages through Python.
Disclaimer: This tutorial is intended solely for educational purposes. While you can use this library to schedule messages for celebrations while learning Python, I advise against using it for messages that require confidentiality.
Section 1.1: Sending Messages with pywhatkit
pywhatkit is a versatile Python library that allows for various functionalities, including sending WhatsApp messages. It is user-friendly and does not require complex setup. However, it has several dependencies, so I suggest installing it in a new virtual environment (you can learn how to set up a virtual environment [here](#)).
If you prefer watching a video for better understanding, check out the one below!
Be sure to subscribe for the Automation Cheat Sheet (Free PDF) that I offer!
Step 1: Installing pywhatkit
To get the latest version of pywhatkit, open your terminal and run the following command:
pip install pywhatkit
The installation should only take a few seconds to a minute. Once complete, you can verify the installed dependencies with:
pip list
Step 2: Sending a Message to a Contact
Before sending any messages, you need to log into your WhatsApp account via WhatsApp Web. This method will not function if your phone is not connected to the same Wi-Fi network as your computer or if your phone is out of range.
To send a message to a WhatsApp contact using Python and pywhatkit, utilize the .sendwhatmsg method as demonstrated in the code below (remember to replace the placeholder with your contact number):
import pywhatkit
# syntax: phone number with country code, message, hour and minutes
pywhatkit.sendwhatmsg('+1xxxxxxxx', 'Message 1', 18, 52)
This code instructs the system to send "Message 1" to the specified contact at 18:52. After executing this code, your browser will open WhatsApp Web, and the message will be sent automatically after a brief delay.
Important Note: When your browser opens, a prompt asking for permission will appear. You need to accept this for the library to control your browser.
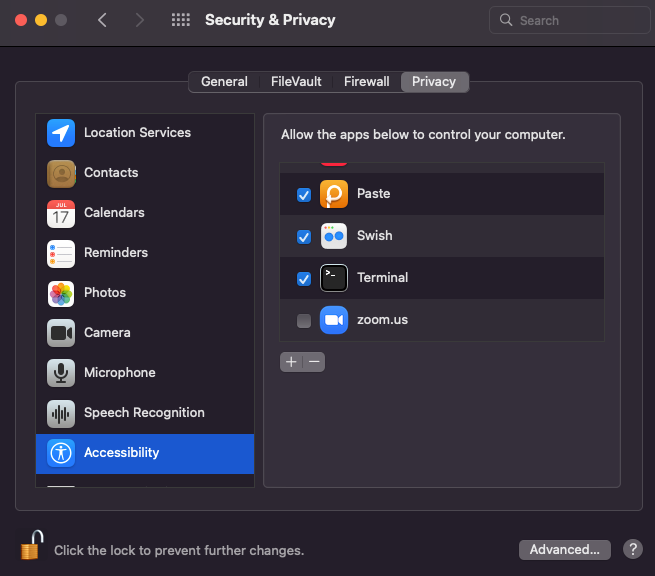
You can also adjust settings manually. On macOS, navigate to "System Preferences," select "Security & Privacy," click on "Accessibility," and ensure that "Terminal" is checked.

Step 3: Sending a Message to a Group
You can also send messages to a specific WhatsApp group, but first, you need to obtain the group's ID.
To find the ID, follow these steps:
- Open the desired group and select the "Group Info" section.
- Scroll down to the "Invite via link" option and tap it.
- Copy the link displayed; the suffix portion is the group's ID.
Once you have the group's ID, you can use the .sendwhatmsg_to_group method. This method is similar to the one used for sending messages to contacts, but now you'll input the group ID:
import pywhatkit
# syntax: group id, message, hour and minutes
pywhatkit.sendwhatmsg_to_group("write-id-here", "Message 3", 19, 2)
That's all there is to it! Additionally, pywhatkit provides other methods, such as .sendwhatmsg_instantly and .sendwhatmsg_to_group_instantly, although they may not work in every case.
Here are the parameters utilized in this tutorial for both .sendwhatmsg and .sendwhatmsg_to_group:
- phone_no (str): The recipient's mobile number
- group_id (str): The ID of the group
- message (str): The message to be sent
- time_hour (int, 0–24): Scheduled hour
- time_min (int): Scheduled minutes
- wait_time (int = 15): Default wait time before delivery
- tab_close (bool = False): If set to True, the tab will close after the specified seconds post-delivery
- close_time (int = 3): Number of seconds before the tab closes after delivery
Join my email list, which includes over 10,000 subscribers, to receive my Automation Cheat Sheet, available as a free PDF!